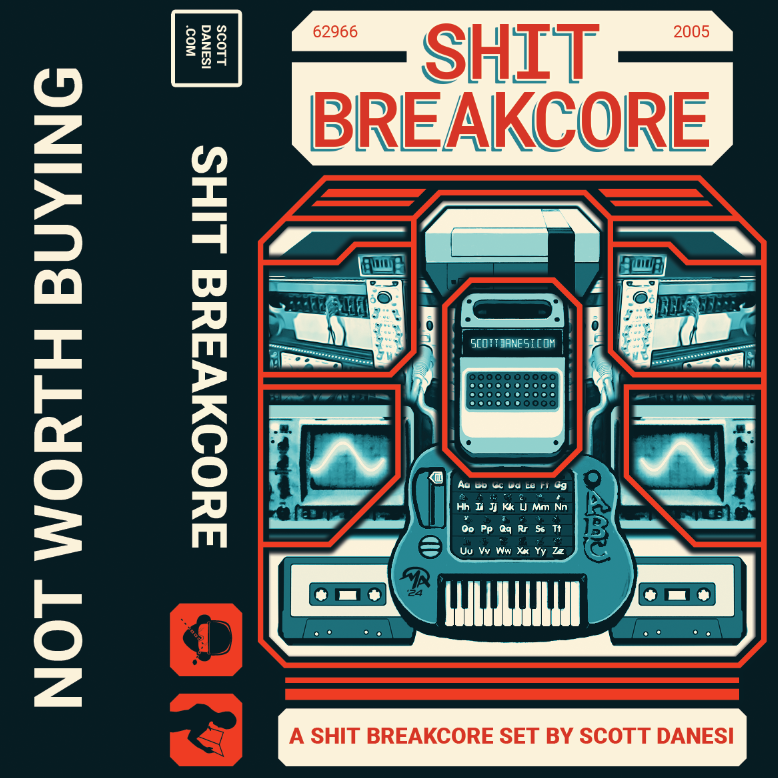
Hi Everyone! I am proud to share that I have released a new album on cassette called “Shit Breakcore”. This one is a bit special as it is not a traditional album, but a shit recording of a live performance I did back in 2005 alongside some of my closest friends and awesome headliners. Here is story on why it is special to me. Sit back, relax, and drink a coffee, this may be a long one… 🙂
The Venue
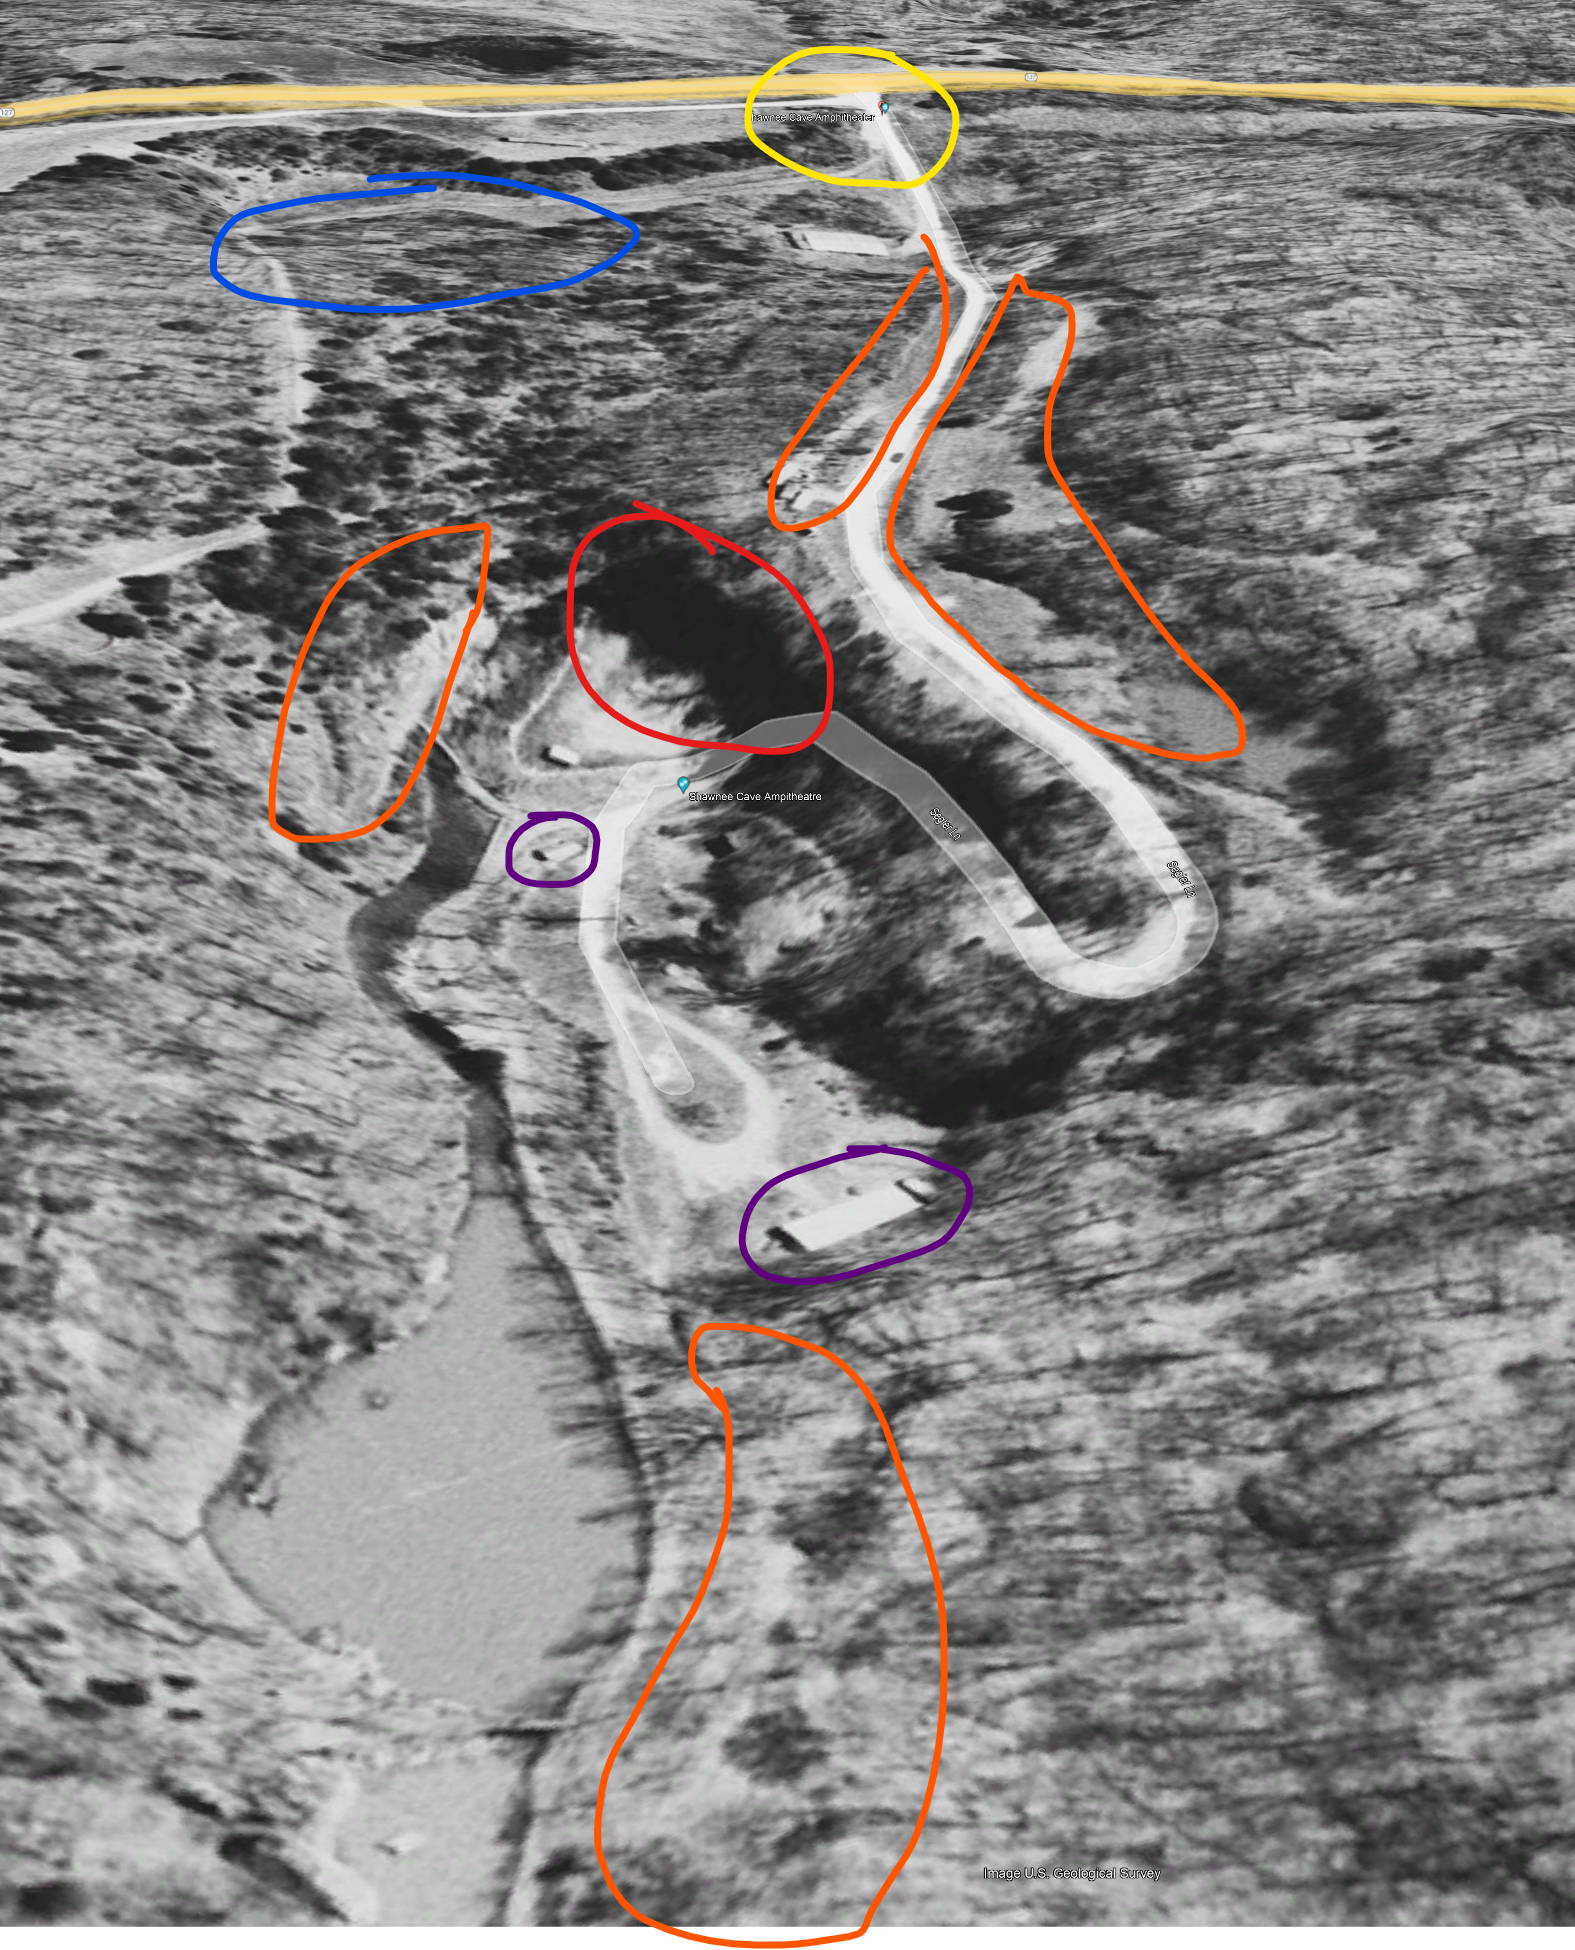
This performance took place on June 18th, 2005 in the Shawnee Cave Amphitheatre in Murphysboro, IL. The Event was called “Underground Sound – Midwest Freakfest” which was a weekend long camping event featuring more performers that I can recall. I was lucky enough to be put on the main stage of this event which was actually located inside the cave facing outward toward the dancefloor area. This place was huge, it even had a little lake and small river going through it. I put up a Google Earth satellite picture from 2005 with a few sections I wanted to highlight above. Civilian satellite imagery was not that great back then.
Here is the color legend for the picture above:
Yellow: Main entrance (only entrance into the venue, so it was guarded pretty well).
Blue: Main parking area.
Orange: Just some of the many camping site areas.
Red: The main stage inside of the cave.
Purple: Additional stages for more performers. There were a total of 9 different stages at this event. I believe the rest were scattered around in the forest around the property, but I do not remember the exact locations of all of these.
Above is a picture of the main stage of the Shawnee Cave Amphitheater. This particular picture was taken at a prior, and much smaller, event from 2003. For some reason, I do not have any pictures of this event. If you were there, please shoot me over some pictures and I will update this story. 🙂 I was lucky enough to have been on the staff and performance crew for 3 events at this location. It is absolutely a beautiful and special place.
Event Performers / Event Info
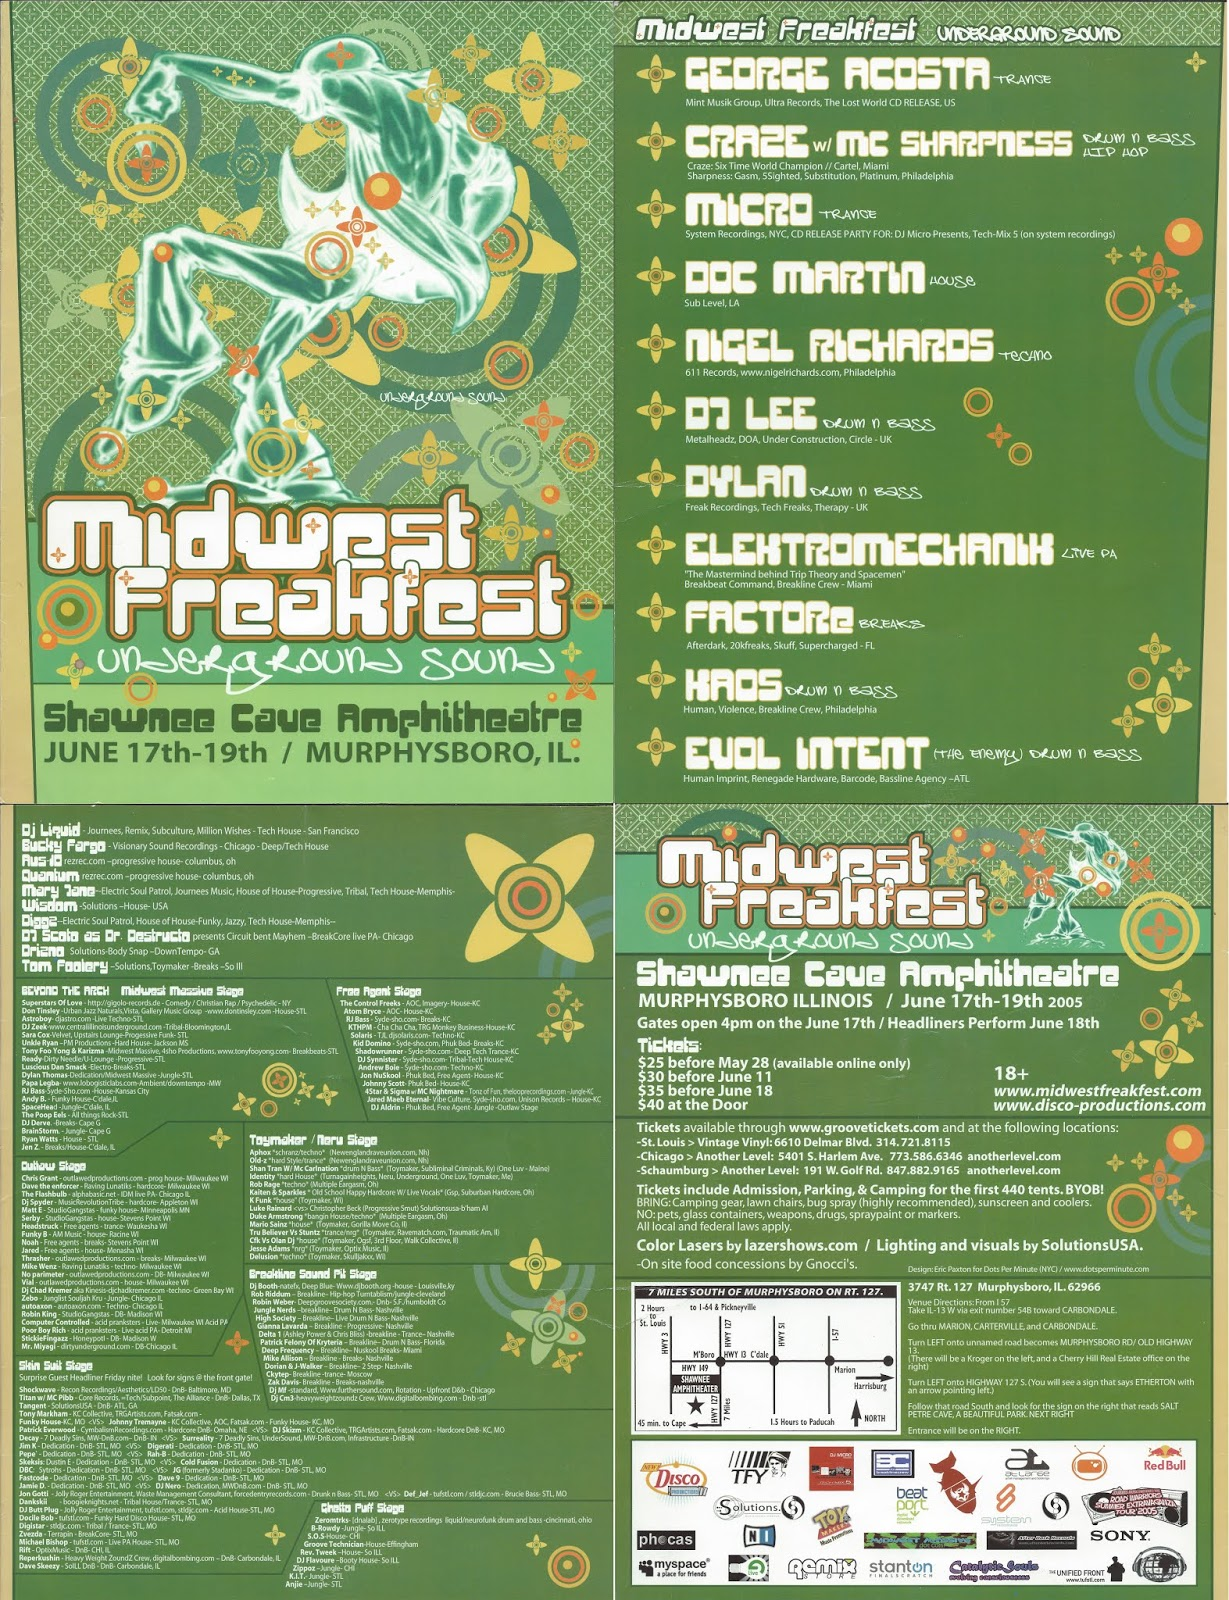
This event was put on by a really good friend of mine, who I unfortunately have lost contact with, Tom Foolery. Tom, if you are reading this, hit me up! This guy was one of the best party throwers of the time in my opinion. He brought in all the right people, secured the best spots, and made the party goers feel safe. Above is a copy of the actual 4-page party flyer that we were passing around all over the midwest. This is such an awesome time capsule. Tom was able to get some really huge performers that are still active today. Sorry for repeating this many times, but I am so grateful to have been asked to perform at this huge and iconic event. I am on the 3rd page in the top left quadrant as “DJ Scoto as Dr. Destructo”. I think I was toying with the idea of using the alias “Dr. Destructo” for my breakcore sets.
The Main Stage and Sound System
The main stage was set up with a massive sound system. I mean massive. It was a large semi truck long trailer full of subwoofers, uppers, and amps. The system was brought in from a really well known promoter from Minneapolis, MN. This sound system was larger than any concert I have ever been to at this point in my life. It does makes sense though, when you are outside, not near any residential areas, you want as much power as you can get.
As part of the staff/performance crew, we were able to get in early on Friday to set up camp and get ready to help get the show all ready to go. Our crew, which consisted of a bunch of my buddies and my brother, Kevin, set up camp in our favorite spot. This spot was stage right (or to the left of the main stage) up on a hill. It was such a good spot as you could see over the whole lower venue and had a great view of the main stage.
Since the headliners were not playing on the main stage until Saturday, the main sound system was not used on Friday night. My memory is fading a bit on this one, but I think it was a much smaller system used on the main stage Friday night and some of the DJs did perform on this system. It still sounded great. I was actually able to go to bed on Friday night at a decent time and slept right through the early morning sets.
The sound crew did not completely set up the main sound stage until Saturday morning. I was still sleeping at the time they finished setting this up. I was woken up by what I thought was an earthquake. The ground was shaking in a pretty violent way. This was the team doing a sound check on the main system. I am not sure what they were using to test, but I am pretty sure it was only the subwoofer banks being tested first. Once I realized what it was, I became so excited. This was going to be an awesome Saturday!
The Live Setup / Hardware
My hardware setup for this show included many hand built or modified synthesizers, mixers, effects processors, and circuit bent toys, many of which I still have in my possession today. The heart of the system was my shitty laptop handling a bunch of mission critical sequencing.
Synthesizers
The most prized of these “synthesizers” is my MIDI controlled Nintendo Entertainment System. I have had this NES for many many years and I used to play it a bunch as an NES, but after modifying it with a 1/4 inch output port and permanently installing a MIDINES cartridge into it, it is now a full time synthesizer. Don’t get the wrong idea here though, most of this hardware was shitty, noisy and unpredictable. I also had my custom circuit bent Speak and Read, which is still one of my most prized circuit bent toys. In fact, in 2023 I sent this toy off to one of the best circuit benders to get restored back to the way I had it. There were other small bent toys and a bent electronic piano synth that I sequenced as well. I was mostly using it to fill in some glitch sounds throughout the set. I had my Space Bass 303 (not circuit bent) hooked in as well to really add a bunch of low end to the set.
Laptop
The main control unit of this setup was my old shitty laptop running Ableton Live. I had a pretty junky audio and MIDI interface for it too. It worked, but the computer and interface had a bad ground loop and since the power there was noisy, it made it even worse, but in in a good way as you will see in the recording. This computer was barely powerful enough to do what I was asking it to do as well, I was right on the edge… The main issue with the computer setup was the MIDI lag that I had to make up for when live triggering. I will get into more details about that when I talk about the actual performance. In Ableton, I created a bunch of midi loops and some pre-recorded audio loops, so I was able to sample vocals and loops from some artists I liked to do some live remixing. These artists included Fear Factory, The Chemical Brothers, Eminem, Rush, and a few others. I was triggering these loops with my mouse, which was a horrible idea, which will make more sense later. I had grouped these loops in scenes that made sense, with duplicated loops so I could make somewhat transitions between segments. The data out to the midi gear was something I had to watch closely as I almost always had every instrument getting sent data all the time and used my main mixer to bring in and out these different parts. Most of the drum parts were being handled by loops that i created and rendered ahead of time as the computer did not have enough power to run a VST (virtual) drum machine. I did however use the 8-bit drum samples from the NES extensively all through this set and was even triggering them live with a MIDI intercept device that sat between the PC and the NES. I could intercept and modify incoming MIDI data from the computer before it hit the NES, it was really cool, and yes, janky and unpredictable as it would sometimes corrupt the data (which it did… a few times…). The coolest thing I could do with it was change the waveforms and offset the data in real time as the NES was running.
Mixer and Main Out Chain
For my main mixer, I used my pretty shitty Behringer 16 channel mixer. This thing was a clone of a mackie mixer, except made cheaper with cheaper parts and worse sound quality. I did not care though, this is breakcore. The master out chain had a Boss Heavy Metal guitar pedal on it that I was using as a compressor and safety limiter for the outgoing signal. It added to the overall distortion of the set as well, which sounded really cool.
The Performance
My 45 minute set was scheduled for 12:00pm Saturday on the main stage. This was the opening slot so it was going to attract a good amount of people as it would be loud and the first set of the day on the main stage, which would be running all day and into the night with awesome artists. After I got everything set up, we did a quick low volume sound check to make sure the sound guys were getting my signals. This worked perfectly, but the sound guy did tell me to back it down a bit as my signal from the Metal Zone pedal was pretty hot. This set was breakcore, so I am not sure he expected the signal to be so compressed and destroyed by the time it got to him.
The Start
I started the set out at a low intensity, you can hear the distortion, ground loops, and other interference noise coming from all the shit equipment I made. This quickly escalated into some pretty insane breakcore with screaming synths and distorted basslines and drums.
The Bass and Laptop
The set went pretty well, but I had one big problem. I could barely hear my headphones on my head as the sound system was so loud. This was amazing! The bass resonance was even distorting my vision, which lead to another awesome problem. I was having a tough time reading the screen of my laptop. Now, I do think there is a time and place for laptops to be on stage, but I have learned that a mouse is never a good way for me to interface with it. All it takes is one wrong click and you could launch a scene that makes no sense or worse, stop your MIDI clock. Luckily, none of this happened and I was able to get pretty good at dealing with it.
The Hardware Failures
During the set I had a few hardware failures that a normal person would probably never notice, but I am going to call them out so you can listen for them. One of the major failures is when the MIDI controlled NES locked on. This can happen when the MIDI data gets corrupted due to signal noise or the NES just giving up because I sent it something that it did not like. Either way, it was pretty funny as I had to hit the reset button on the NES just like you would have playing a game that you wanted to restart. The next failure was from the circuit bent Speak and Read. I figured this would happen as circuit bent toys really have a mind of their own. You will hear a few times where the toy locked on during a glitch sequence when I did not expect it to. It actually turned out pretty neat. The next hardware failure again was the NES. I was triggering some distorted kicks drum samples from the NES and the MIDI trigger got delayed by almost a half second, it was odd and I never really figured out why this happened. It could have been a conflict on the MIDI intercept device I was using, but no big deal there, still sounded good.
Reaction from the Crowd / End of the Set
At the beginning of my set, I looked up and noticed that people started gathering in front of the main stage to see what the hell I was even doing. Not much dancing was happening at this point as I am sure some of these people have never heard breakcore before, which was expected. It was nice to see my friends all there having a great time right off that bat though. It was not until about 10 minutes in when more and more people started gathering around and started dancing and having a good time. Let me remind you that this was 12:10pm in the afternoon, which was basically morning for everyone who stayed up late the night before partying. I was actually surprised to see a pretty large crowd assemble and seem to be enjoying it.
The End
I kept looking at my clock to make sure I was on track timewise during the set. I am really careful not to go over as it is pretty disrespectful in the party scene to do that. I wanted to also make sure the sound guys had enough time to get the next person ready in between artists. The last time I looked at the clock, I had about 5 minutes remaining before I had to stop. This was when I realized I had so much more content I wanted to share. So I did what any breakcore artist would do in this situation and just started layering all sorts of things on top of themselves and made a ton of noise! You will notice at the end of the set where it just starts to sound chaotic as I fly through a bunch of stuff. When I eventually got to the end of my time, I just left everything running I turned off all the MIDI hardware and used a bitcrusher on the master channel of the PC to smash the remaining pre-rendered audio loop down to 0 bits. For those that do not know what that means, it means nothing, I smashed it so much that the sound turned to nothing. The set when silent except for all the signal noise and dirty ground loop noise. This was also being amplified by the main compressor so it was worse than it was.
Final Reaction
Once the sound crushed to 0 bits, the venue went silent. I looked up, everyone was standing there waiting to see the next move, but nothing. They quickly realized the set was done and started clapping and yelling. It was the most amazing feeling and I had the biggest smile on my face. This feeling is something I cannot describe, and luckily nobody saw the tears in my eyes. It was very validating.
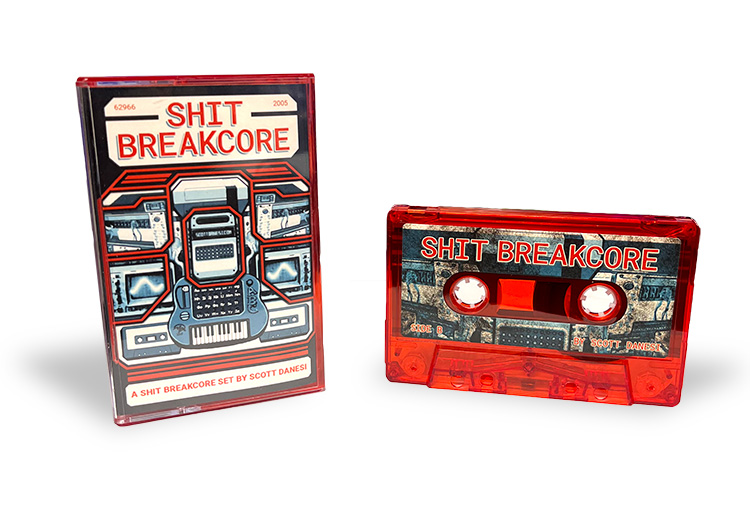
The Recording and Cassette Release
I wanted to make sure to record this performance, but I did not have a good way of capturing the master channel output with the computer, since I was not feeding the master out back into it. Also, the shitty laptop would struggle when recording and trying to sequence everything in time. This also massively added to the MIDI lag that I had already in the setup. So, the laptop was out. The only other option I could think of quickly was borrowing my friend DJ Kiddo’s mini disk player and recording on that with a 1/4 inch to headphone jack converter cable. This actually worked as the mixer I was using had 2 main outs. The only issue with that setup is that I had no way of knowing if the signal was too hot for the mini disk player, which it was. This resulted in a perfectly shitty, clipping, and generally noisy recording of the show.
Mastering the Recording
It was not until recently (2024) that I got the idea to take this shit recording and send it off to get mastered by a professional to remove the noise and do some general equalizing and fixing. This inspiration was driven from the overwhelmingly positive and surprising feedback I got from the people that bought my vinyl which was released the same year (2005). This limited edition vinyl had one of my original breakcore tracks on the second side.
I sent the recording to my mastering engineer to take a listen to see what needed to be done. I explained this whole story that you have just read to him before I sent it over. It was a few days later I get back a message from him saying that he was not going to master it. At first I thought it was just because it was too far gone, but I kept reading his response and long story short, he thought it was the perfect time capsule. He said it totally captures the moment as is and recommended I just send it to cassette manufacturing as is with a little bit of gain reduction, but that was it. I am so glad he recommended this.
Cassette Release
I made the decision to only release this live recording on cassette. This will not exist digitally, at least not from me in its digital form. I know this may sound strange, but I like the idea of people who have the cassette enjoying this recording on purpose. When you listen to a cassette, it is a conscious choice to do so. Also, another huge factor is that there are a ton of uncleared samples that will get me flagged, so there is that too….
Another cool thing is that Matt Andrews (mandraws.com) did the artwork for this release as well. If you are not familiar with Matt’s work, he did the art for the Total Nuclear Annihilation pinball machine along with many other new games now. He has also done a bunch of my album art over the years. Thank you Matt!
Conclusion
So I know I have been talking a bunch of shit about my shitty hardware and shitty recording, but this show was perfect. It was at the perfect time, it was at the perfect location and it was with the perfect people. If I could go back in time and do it again knowing what I know now, I would not change a thing. This set captured a moment in time perfectly and I hope you love it as much as I loved performing it.
If you happen to have some pictures from this show I would be grateful if you could send them to me. I cannot believe I did not take any with my personal camera. I can post them up on my website.
Also, I will leave commenting on below, if you were there and have stories or just want to share some feedback about the recording, please do so below. I would love to hear from you.
If you made it this far thank you and if you want to get one of these cassettes, thank you again. If I end up making any profit on selling these, I will absolutely dump it back into releasing a breakcore album. I might even use the alias Dr. Destructo finally. The cassettes of this recording are available at Pinball Life at the link below. Thank you all so much for reading my story and, as always, thank you for your support. <3 –Scott
Purchase the Cassette Here