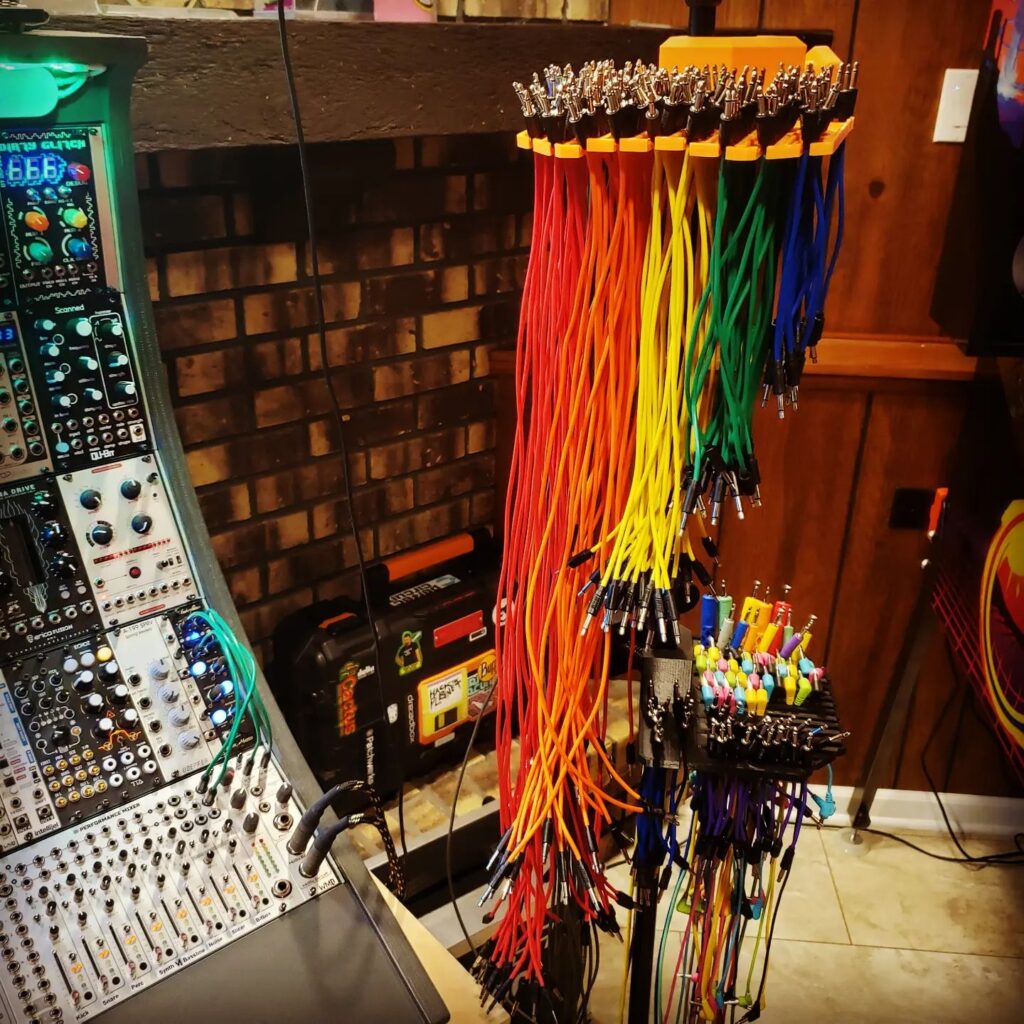
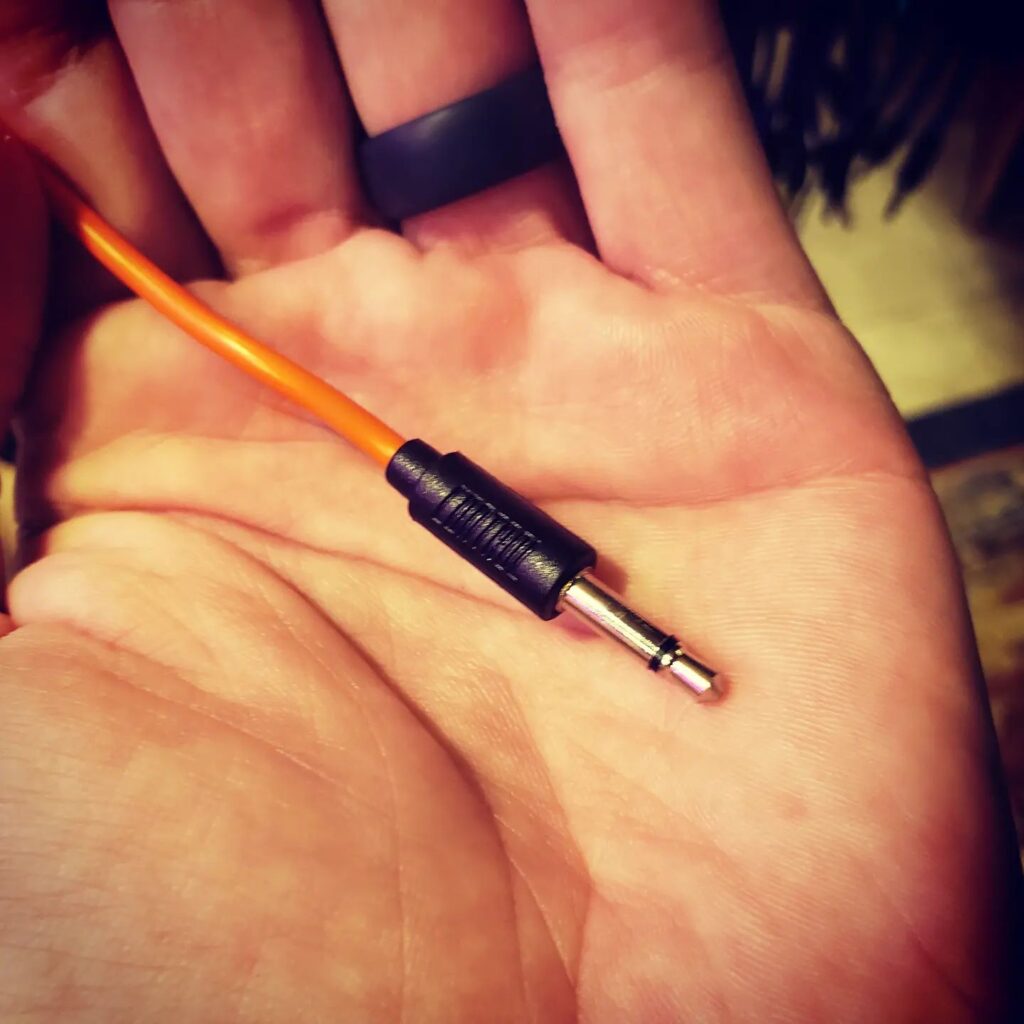
Finally upgraded all my main patch cables to something I am super happy with. These are @ctrlmod BT patch cables. They are thin, bend nicely, and have a low profile barrel. By far the ones I am most happy with. I ended up color coding by length in rainbow order, so I can quickly grab a longer or shorter cable without thinking. Also, it looks neat when they are hanging. ![]() Just thought I would share as I know finding patch cables you are happy with is tough.
Just thought I would share as I know finding patch cables you are happy with is tough.
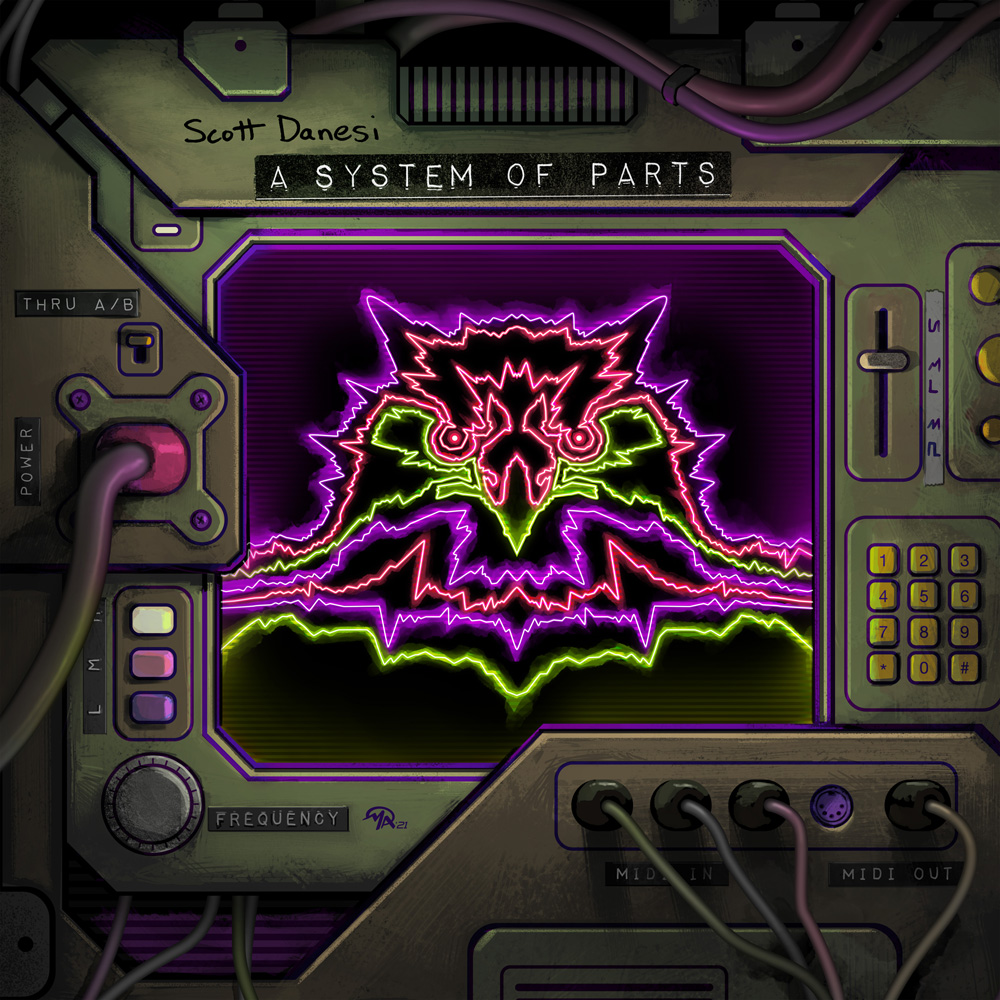
Hi Everyone! I know if has been a while, but I have finally polished and packed up my newest album! This album has been in the works for over 2 years now and is finally available right here and on Bandcamp.
I will be releasing this to all the streaming services in about a month and it will also be released as a limited edition cassette later this year. I am still trying to see if it is feasible to so a double vinyl release of this as well, but will keep you posted on that.
Special thanks goes out to Dan Kushner on this album for the use of his Vocals and Samples of his song “Bento Box” and also Matt Andrews for his amazing art package for this release.
Click here to check out the release!
As always, thank you so much,
Scott
Hey Pinball Homebrewers!
I have had a couple people ask me about using the Total Nuclear Annihilation Numeric Score Displays in their homebrew games. Now that Pinball Life has these display assemblies in stock, I figured I would do a little tutorial on how to use these.
https://www.pinballlife.com/mm5/merchant.mvc?Screen=PROD&Product_Code=PBL-600-0473-00
Powering up the display
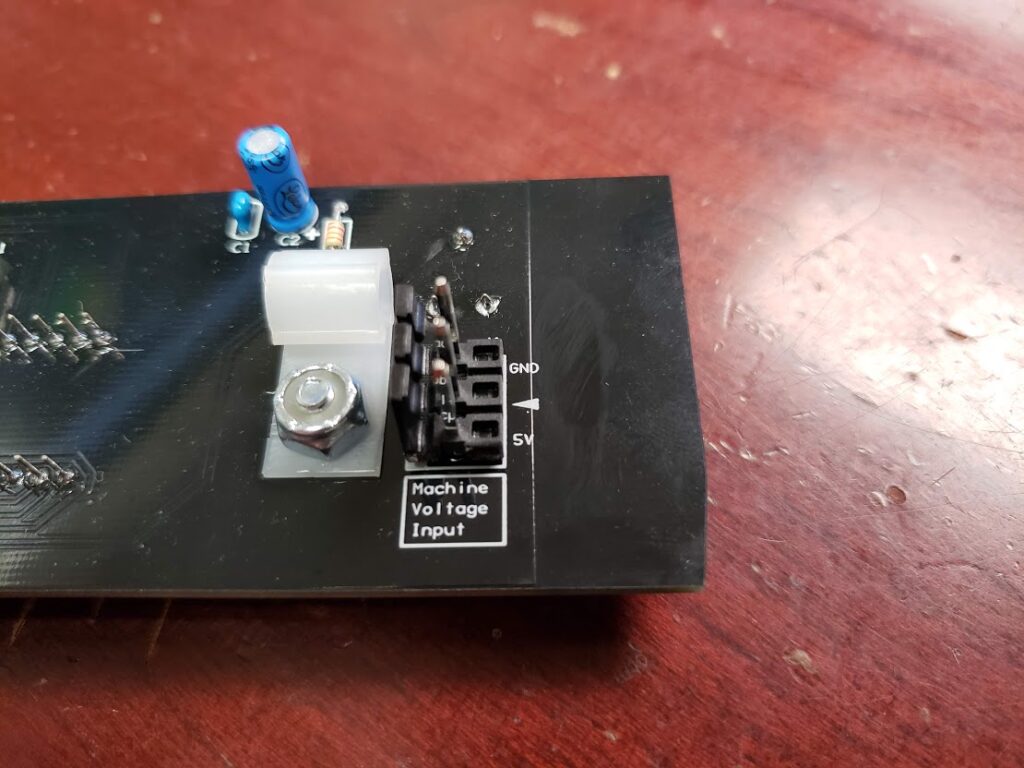
The display assembly has a 3 pin 0.156″ header on the back. This is the main power input for the display. You will need to look at the silkscreen on this header and make a connector that supplies a solid ground and a solid +5vdc. Just make sure it is plugged in the correct orientation.
Arduino Nano
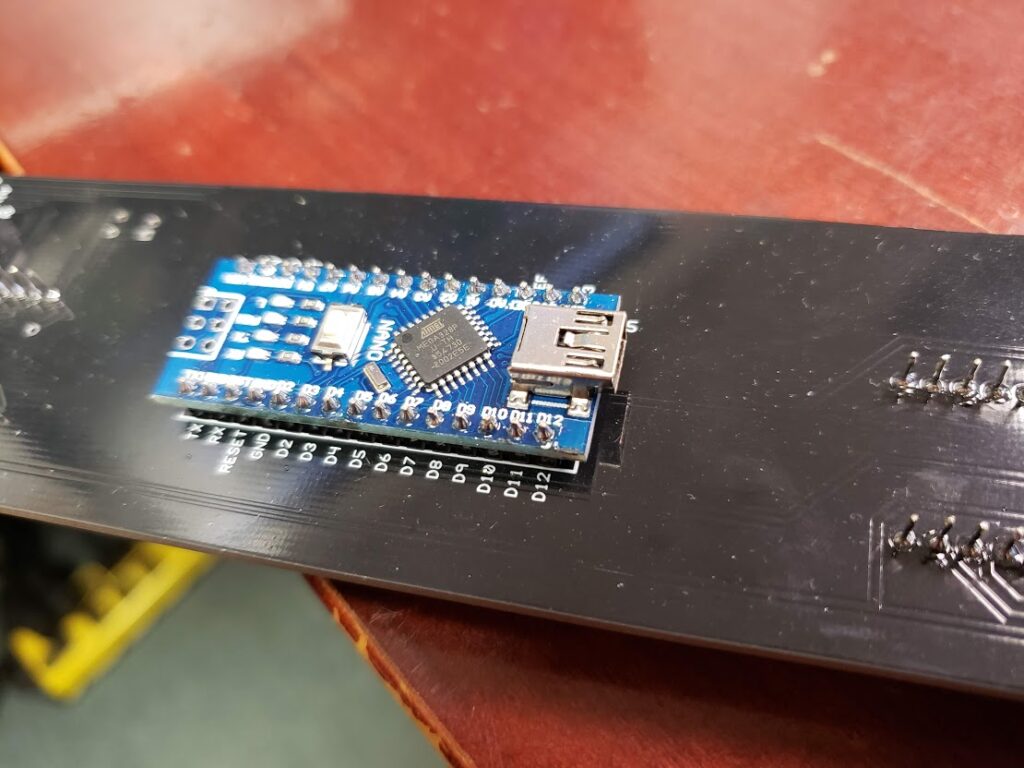
On the back of the display assembly, you will find a pre-programmed Arduino Nano ready for you to send it some instructions. This Arduino will not power up with the main power input and will need to be plugged into an active USB port to come alive. This is a Mini USB connection. Make sure when plugging this in, you use the included strain relief located by the main power input header.
Sending Data
Now into the more fun stuff. The display assembly needs to be sent some serial data from the USB to the Arduino in order to display stuff. I am going to provide some Python samples, but honestly all that is happening here is the PC is just sending the display a line of text. The Arduino will parse it, do all the heavy lifting, and display the numbers on the LED displays!
Text Format
The Arduino is looking for a text string in the following format.
"A:B:C\n"A: A is the mode of the display. This can indicate whether you want the score to flash, not flash, clear the data, or flash a match (last 2 char flashing).
1 = Not Flashing, just display the score
2 = Flashing, used for current player up
3 = Clear the display
4 = Match display, will flash the last 2 characters of the score
B: B is the number of the display. This value will be between 1 and 4. This is so you can address the correct display when sending score data.
C: C is the actual score! This is a numeric value between 0 and 99999999. Do not put commas here, the Arduino will handle that.
\n: This is the terminating character so the Arduino knows it got a complete line of code.
Examples
Example 1:
"2:1:100000\n"In this example, the first display will receive a flashing on 100,000.
Example 2:
"1:2:200000\n"This example will display 200,000 solidly on display number 2.
Example 3:
"3:1:0\n"This example will completely clear display number 1.
Python Code Examples
In order to send serial text strings over USB with python, I use PySerial. This will allow we to easily send this data to the display assembly.
Opening The Serial Port
    def openSerial(self):
        i = 0
        while (self.serialOpen == False and i <= 9):
            try:
                device_path = '/dev/ttyUSB' + str(i)
                self.game.log('Attempting to open serial port ' + device_path)
                self.ser = serial.Serial(device_path, 115200)  # attempt to open serial port
                self.serialOpen = self.ser.is_open
                self.game.log('Serial Info:')
                self.game.log(str(self.ser))
                self.serialOpen = True
            except:
                self.game.log('Attempt failed to open serial port ' + device_path)
                i = i + 1
This code will scan through the USB devices and try to connect to the Arduino. This code is probably not the best way to do it, but it has worked out well for the TNA project. 🙂
Closing The Serial Connection
    def closeSerial(self):
        try:
            self.ser.close()
            self.serialOpen = False
        except:
            self.game.log('Attempt failed to close serial port')
            self.serialOpen = False
Testing and Sending Data To The Display
    def testSerial(self,String="1234567"):
        self.ser.write("1:1:" + String + "\n")
        self.ser.write("1:2:" + String + "\n")
        self.ser.write("1:3:" + String + "\n")
        self.ser.write("1:4:" + String + "\n")
The above code will be how you should be able to send the data to the display assembly! This test method will send the score of 1,234,567 to all 4 displays.
I wanted to take a moment to thank Jim Askey (MyPinballs). This text string is based off of a serial data project that he did for integrating Bally displays into P-ROC games back in the day. I really liked the text format, so I kept within the same style for this, but added extra functions. Thank you Jim!
That should be all you need to get running. If you find any errors in any of this, please let me know here and I will correct it.
Thanks Everyone!
Hi Everyone,
When developing a pinball machine early on, there will be a need to actually flip the game and check geometry. Since the game is very early in the build and most people do not have a dedicated rig with a computer/driver system in it to test with and will need to wire up some flippers. Since I have gotten many questions about powering up flippers on their homebrew pinball machines, I figured I would take some time to walk through my opinion on the best way to do it.
Hard Wired System 11 Flipper System
This is my preferred way of testing out early geometry as it will emulate production flipper behavior 100%. The below instructions are assuming just 2 flippers for simplicity, but this can be applied to as many flippers as your game has. I am also assuming that the playfield is in a cabinet with flipper buttons installed. 🙂 These flipper assemblies are also very robust and reliable to use in the production or final version of your homebrew game.
Items needed:
- 48v Switching Power supply with at least 600 watt capability
- 2x High Voltage Flipper Switches
- 2x System 11 Flipper Assemblies
- 18AWG Wire
Hookup Method
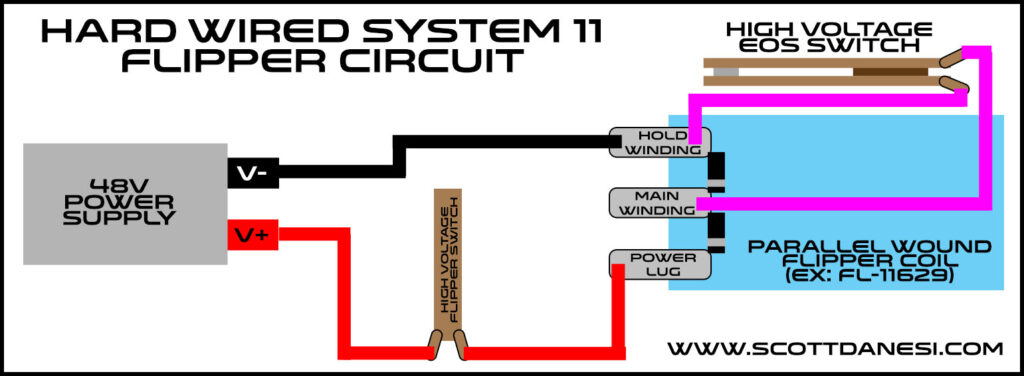
After your flipper assemblies and flipper switches are installed on your playfield and cabinet, you can begin the process of temporarily wiring these up. The wire routing starts at the positive (V+) side of your power supply. You then need to run a wire from this V+ connection to one side of your high voltage flipper switches. The side does not matter as a switch does not care. You will then run this line from your flipper switch to the power lug on your parallel wound coil. You then need to run a line from your negative (V-) side of your power supply to the hold winding lug of your coil. This is the lug that is on the opposite side of the power lug.
You should now be able to check that your normally closed EOS switch is being opened on a full stroke of the flipper. Once this is adjusted, power it up and flip away.
For those of you that are more visual learners like myself, I drew up a crude wiring diagram for you below.
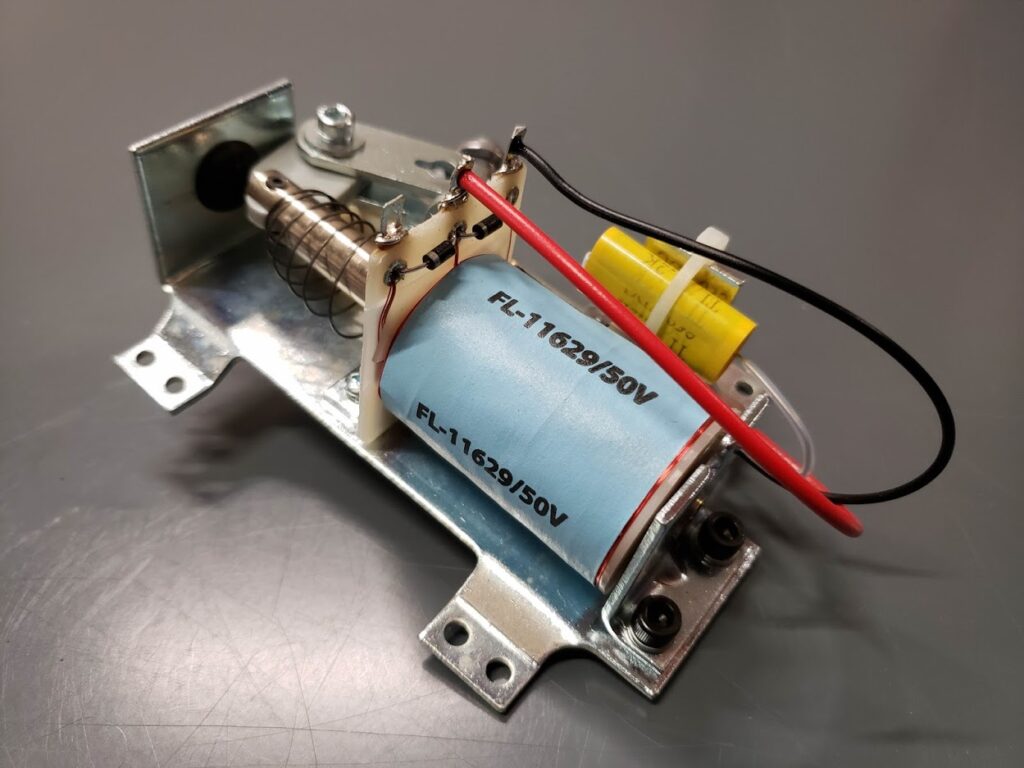
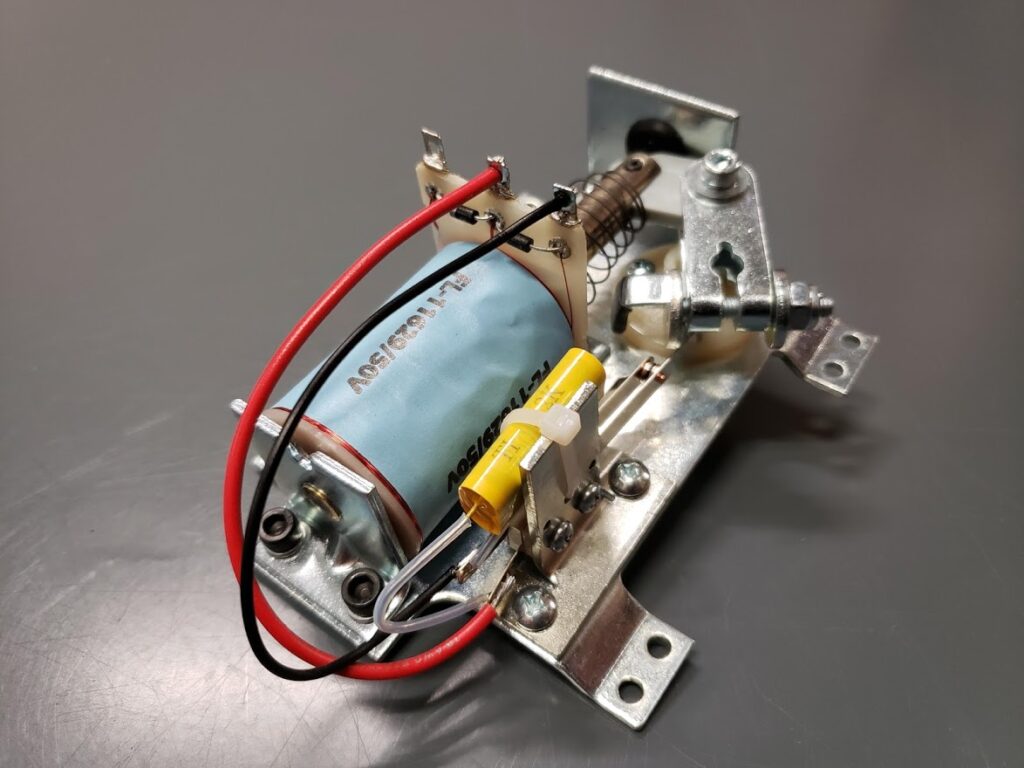
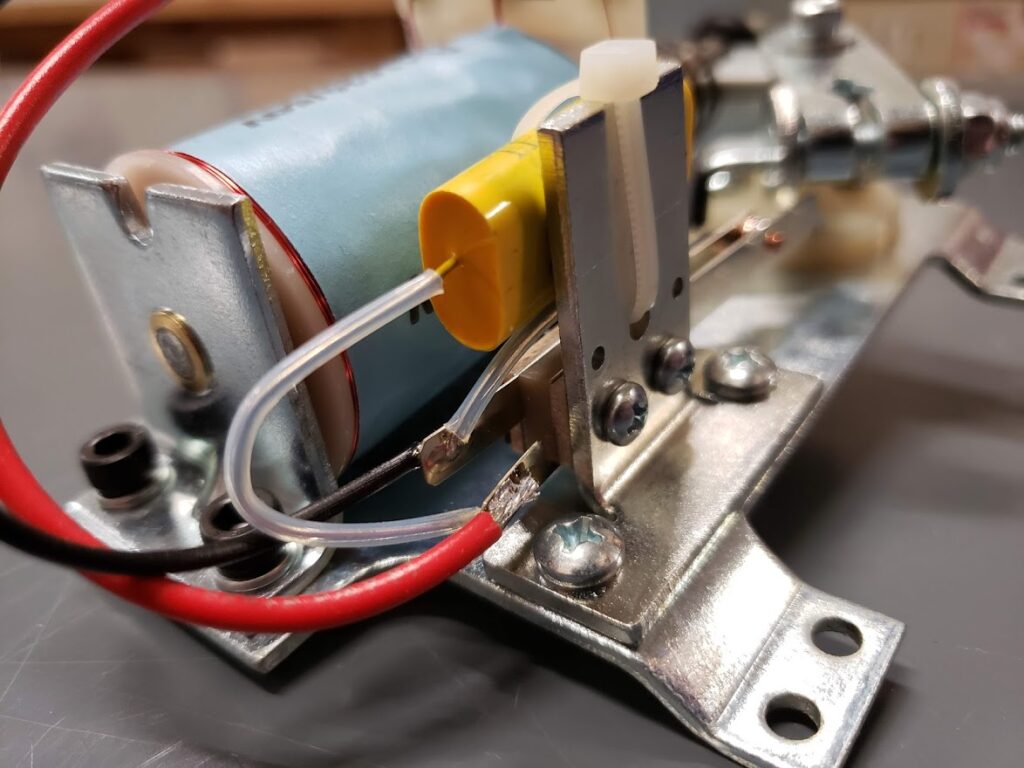
Here are a few close up pics of the System 11 Flipper Assembly
Some notes
- You can choose to put the high voltage flipper switch on the negative line if you want, it does not matter in this case. I choose to switch the positive, so there is less risk of shorting it to ground when tinkering under the playfield.
- In this configuration, your flippers will be active whenever the power supply is on.
- The System 11 Flipper Assemblies may have yellow spark arresting capacitors on the EOS switch. Leave those on there as this will help prolong the life of your EOS switch. 🙂
- These System 11 Flipper Assemblies, in my opinion, are far superior to the WPC ones since the compression spring is less likely to break causing the game to be down. Almost everything else is the same.
- DO NOT USE THIS METHOD WITH A TRANSFORMER. Use a switcher power supply only.
Now, this is only a temporary solution as the flippers will be active as soon as you power on the machine every time. When you decide to hook up your control system, you will need to remove the EOS switch, route the 2 winding lugs to 2 channels of your driver board, then route the power lug to the fused output of your driver circuit. The flipper switch will need to be swapped out for a low voltage variety and connected to your switch board. You can now configure your control system to use this flipper assembly!
That is basically it, if you notice any errors in this quick article, embarrassing spelling errors or have any questions about this, please hit me up here.
Disclaimer: If you blow up stuff, or burn down your game/house, I do not take any responsibility. Just double check everything before you power it up. If something is majorly wrong, a switching power supply will shut everything down before anything catches fire usually, so don’t stress, but double check!!!
Thank you and good luck everyone!

Another update??? Yes!
Hi Everyone,
I have yet again made another update to the TNA code, this one has a few feature requests and some new functionality added. Oh yeah, I did also fix some bugs… 🙂
The biggest feature update of this release is the ability for TNA to fully interact with the Scorbitron Hardware from Scorbit. Basically, the Scorbitron is a piece of hardware that allows the game to fully integrate with the internet and post scores, leaderboards, and current game statuses online! I have set up a few customized leaderboards here for Total Nuclear Annihilation, Rick and Morty, and my other games in my collection. This is still pretty new tech, so most of my games do not have scores submitted as of the time I am writing this. You can find more information about them at scorbit.io.
Some other cool features added in this release is the ability to show scores on the LCD, show your super spinner status, and have the ball auto-launch when left unattended! These 3 things have been heavily asked for by the community and I am glad to have been able to get them in. 🙂 Enjoy!
Below is the full changelog for this release:
##################################################################
v1.4.2 - 10/25/2020 - Scott Danesi

## Bugs Fixed ##
- Fixed reset issue on ball 2 with orbit status not resetting
- Fixed double flip issue during reactor start eject lightshow

## Features Added / Modifications ##
- Scorbit functionality added
- Added service menu option to show scores on LCD.
    Machine (Standard) -> Scores On LCD
- Added ability to turn off backbox LED during gameplay.
    Machine (Standard) -> Backbox LED On During Game
- Added Super Spinner progress on main screen
- Added ability for game to autolaunch balls if left unattended.
    Machine (Standard) -> Unattended Launch Time
    ['Off','30sec','1min','3min','5min','10min'] - Default is Off
- More ball save grace period on right scoop eject if STDM.
##################################################################
Hi Everyone! Well, another software version has dropped. This one is exciting in different ways than usual. This version has a few minor fixes, including a bit of shaker code re-writing and a weird crash was fixed during Co-Op. Now, for the exciting stuff. This version of the code has 2 different outputs that modders can use to make their mods more interactive with the game. If you are a modder and want to void your warranty, please keep reading, if not, just install the new version in the changelog below and enjoy! 😀
Backbox Drive Last Reactor Only
What the heck does that mean? Well, this new setting, if set to yes, will turn off the backbox LED unless you are on the last reactor and that last reactor is Critical. This driver can then be used to trigger other external things if you know what you are doing. This setting can be found under the Gameplay (Feature settings). Please to not connect anything to this driver that pulls over 1 amp, or you are in for a bad time.
Reactor Status Output
There is an open position on one of the PD-LED boards on TNA where people have been plugging in extra insert lights for their lit drop targets. Well, there is one position that was unused…. Until now. This LED output will send a signal from the PD-LED on one of the RGB lines of this LED output depending on the status of the current reactor.
Reactor Online/Ready will trigger the Blue channel of this LED.
Reactor Started will trigger the Green channel of this LED.
Reactor Critical will trigger the Red channel of this LED.
This output has been requested many times as people want to build more interactive mods for the game. Any modder that uses this outplut will need to make a transistor driver to do anything with this as the output is only designed to handle a 20ma load at 3vdc on each channel. If you exceed this, you risk damaging your PD-LED board and you will have to buy another for $70 USD. If you are planning on just running an LED (with no resistor) from the circuit, it can handle that no problem.
!VERY IMPORTANT NOTE!
Please keep in mind that using these access points for mods is completely your own responsibility and voids your warranty on your game (I think these are up anyway). Spooky Pinball, LLC., Danesi Designs, LLC., and myself take no responsibility if you blow up a board in your game because of something hooked up incorrectly to one of these outputs. If you blow up a board, you will have to replace it yourself.
Please also keep in mind that I can answer basic questions about these outputs, but I unfortunately do not have time to help design your mod.
OK, now that the warning is out of the way, here is the changelog! Download link is at the bottom. Enjoy!
############################################################################
v1.4.1 - 08/15/2020 - Scott Danesi

## Bugs Fixed ##
- Fixed warnings text displaying over the top of teh Total Annihilation kill screen
- Shaker intensity calmed down a tiny bit due to popular demand
- Fixed crash when playing Co-Op with a final reactor set < 9

## Features Added / Modifications ##
- Added ability to use the Backbox LED Strip driver as a trigger for final reactor critical
- Added extra LED Driver dedicated to show only the reactor status
############################################################################
Download Link
https://drive.google.com/file/d/1s_tzHURjs7QVl6NKX5u2zAogMKJh4hKT

Version 1.4.0 of the TNA code is now up! Check out the changelog below.
#################################################################
v1.4.0 - 04/10/2020 - Scott Danesi

## Bugs Fixed ##
- Modified sling logic to hopefully stop multiple hits
- Sling modifications to stop occasional sticking
- Fixed CoOp taking away reactor scores from previous players if additional players sneak in
- Fixed lag issue when replay triggered during reactor explosion
- Fixed score display dimming issue that randomly occurs
- Tilt bug fixed when ball falls into shooter lane after a tilt
- Fixed shaker not pulsing every time on ball lock
- Fixed Co-Op abort issue
- Ball search now disabled in service mode... oops
- Fixed Crash after game over in Co-Op with TA reactor < 9
- Fixed disabling coils on game abort via start button
- Fixed insert lighting issue with left targets on new ball start
- Fixed double hit on shooter switch issue
- Fixed certain settings not being saved when exiting service menu
- Shaker motor intensity fix... again.
- Fixed Super spinner activating twice on certain occasions
- Fixed lightshow logic error that would rarely lock up a lightshow when more than 1 was running at once

## Features Added / Modifications ##
- Start button now constantly on when no credits are in the machine
- Added ability to hold down up and down buttons in service mode to scroll automatically
- New multiball GI colors added to service menu for the fluorescent green plastic protectors (default now blue)
- Reworded Bonus Credit After to "Bonus Credit After X Credits" in service menu
- Beepgate Update
- Mystery Goodness
- Added support for Danesi 2.0 shoot again timer (with RGB lights)
- Added support for new clear drop LED add-on
- All lightshows cleaned up
- Added Tilt Warnings to LCD
- Added utility for clearing coin audit info
- Significant LED performance improvements
- P3-ROC Firmware update to v2.14
- 2 New attract mode lightshows!
- Updated flash speed and coloring of critical destroy targets

#################################################################
Hi Everyone! I just wanted to post this up for all that missed my instructional live jam on my modular rig this morning. I had a great time, and it was fun talking with a bunch of you that I have not seen in a while.
If you have not followed me on Twitch and are interested to see other times when I go live, please follow me at twitch.tv/scottdanesi. I also use my Twitch channel to host some really great music producers, so be sure to check them out as well!
Thank you and enjoy!

Hi Everyone! I have noticed recently a slight uptick in people downloading my album from my website. I just wanted to personally say thank you for the support. This truly means a lot to me that you guys and gals are supporting my work. Purchasing my music directly from my website helps me avoid massive fees from the other distribution companies that sell my music.
I hope everyone is staying safe and healthy during these crazy/tough/uncertain times.
Thank you once again,
–Scott
I am honored to be performing live at the Houston Arcade Expo on Friday November 15th 2019 at 10:30pm. I will also be doing a seminar on Saturday November 16th 2019 at 1:00pm. If you are in the area or traveling in from afar, be sure to stop out play some games, make some friends, and hear some crazy tunes! http://www.arcadecenter.com/


