Hey Pinball Homebrewers!
I have had a couple people ask me about using the Total Nuclear Annihilation Numeric Score Displays in their homebrew games. Now that Pinball Life has these display assemblies in stock, I figured I would do a little tutorial on how to use these.
https://www.pinballlife.com/mm5/merchant.mvc?Screen=PROD&Product_Code=PBL-600-0473-00
Powering up the display

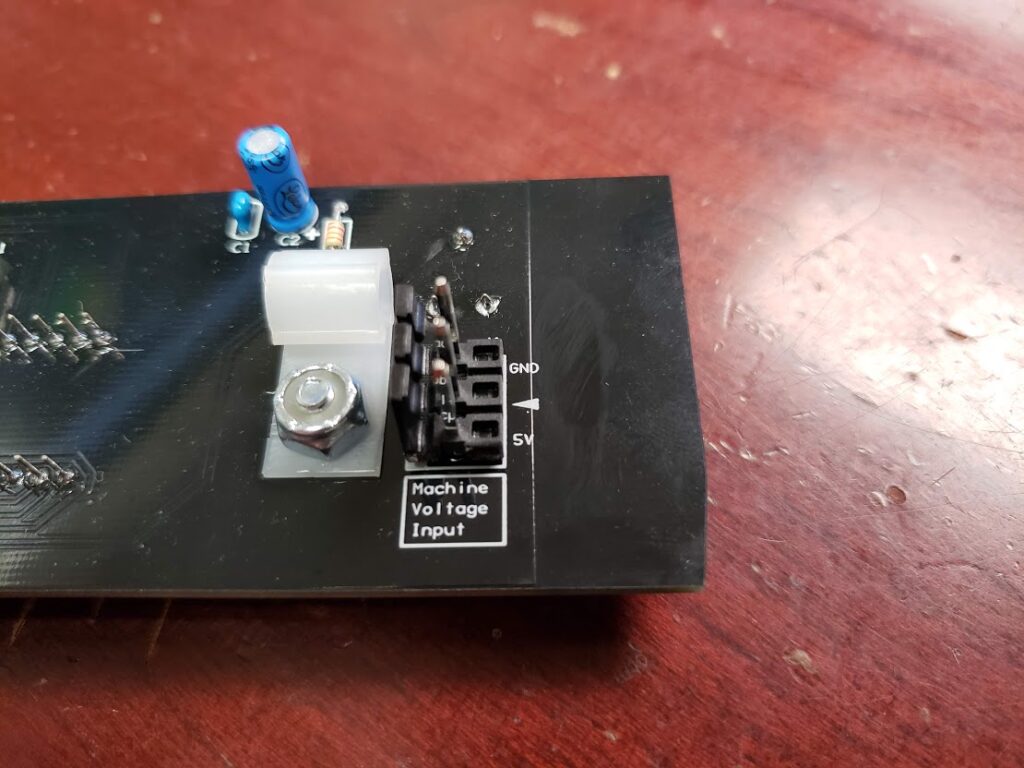
The display assembly has a 3 pin 0.156″ header on the back. This is the main power input for the display. You will need to look at the silkscreen on this header and make a connector that supplies a solid ground and a solid +5vdc. Just make sure it is plugged in the correct orientation.
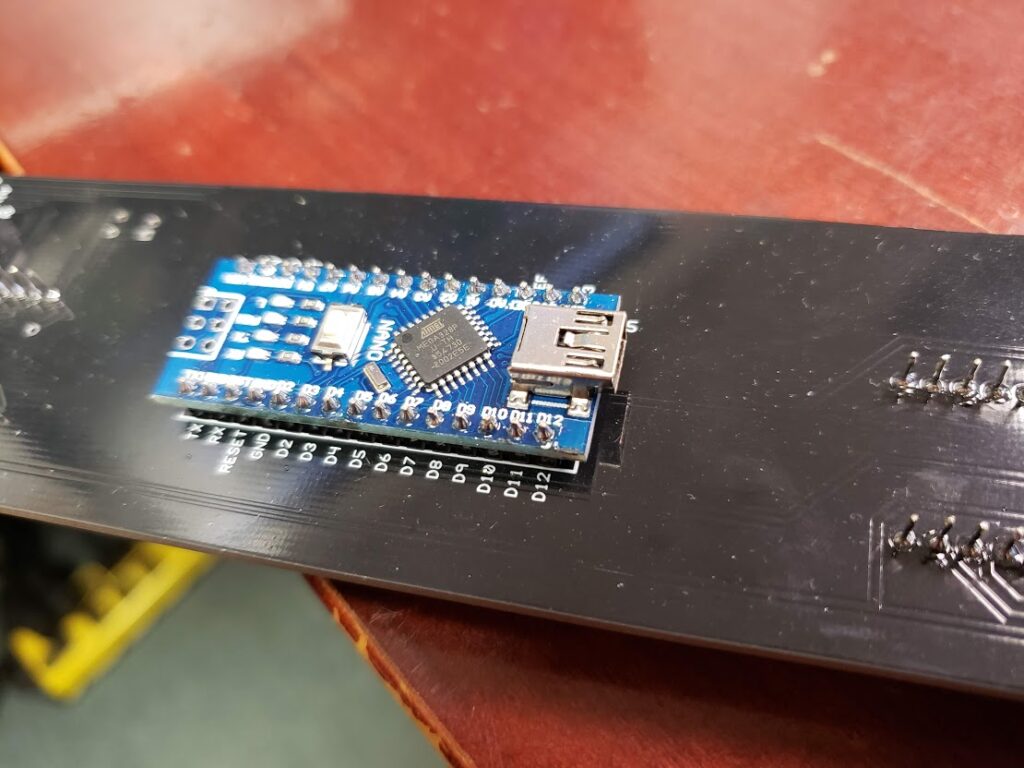
Arduino Nano

On the back of the display assembly, you will find a pre-programmed Arduino Nano ready for you to send it some instructions. This Arduino will not power up with the main power input and will need to be plugged into an active USB port to come alive. This is a Mini USB connection. Make sure when plugging this in, you use the included strain relief located by the main power input header.
Sending Data
Now into the more fun stuff. The display assembly needs to be sent some serial data from the USB to the Arduino in order to display stuff. I am going to provide some Python samples, but honestly all that is happening here is the PC is just sending the display a line of text. The Arduino will parse it, do all the heavy lifting, and display the numbers on the LED displays!
Text Format
The Arduino is looking for a text string in the following format.
"A:B:C\n"A: A is the mode of the display. This can indicate whether you want the score to flash, not flash, clear the data, or flash a match (last 2 char flashing).
1 = Not Flashing, just display the score
2 = Flashing, used for current player up
3 = Clear the display
4 = Match display, will flash the last 2 characters of the score
B: B is the number of the display. This value will be between 1 and 4. This is so you can address the correct display when sending score data.
C: C is the actual score! This is a numeric value between 0 and 99999999. Do not put commas here, the Arduino will handle that.
\n: This is the terminating character so the Arduino knows it got a complete line of code.
Examples
Example 1:
"2:1:100000\n"In this example, the first display will receive a flashing on 100,000.
Example 2:
"1:2:200000\n"This example will display 200,000 solidly on display number 2.
Example 3:
"3:1:0\n"This example will completely clear display number 1.
Python Code Examples
In order to send serial text strings over USB with python, I use PySerial. This will allow we to easily send this data to the display assembly.
Opening The Serial Port
    def openSerial(self):
        i = 0
        while (self.serialOpen == False and i <= 9):
            try:
                device_path = '/dev/ttyUSB' + str(i)
                self.game.log('Attempting to open serial port ' + device_path)
                self.ser = serial.Serial(device_path, 115200)  # attempt to open serial port
                self.serialOpen = self.ser.is_open
                self.game.log('Serial Info:')
                self.game.log(str(self.ser))
                self.serialOpen = True
            except:
                self.game.log('Attempt failed to open serial port ' + device_path)
                i = i + 1
This code will scan through the USB devices and try to connect to the Arduino. This code is probably not the best way to do it, but it has worked out well for the TNA project. 🙂
Closing The Serial Connection
    def closeSerial(self):
        try:
            self.ser.close()
            self.serialOpen = False
        except:
            self.game.log('Attempt failed to close serial port')
            self.serialOpen = False
Testing and Sending Data To The Display
    def testSerial(self,String="1234567"):
        self.ser.write("1:1:" + String + "\n")
        self.ser.write("1:2:" + String + "\n")
        self.ser.write("1:3:" + String + "\n")
        self.ser.write("1:4:" + String + "\n")
The above code will be how you should be able to send the data to the display assembly! This test method will send the score of 1,234,567 to all 4 displays.
I wanted to take a moment to thank Jim Askey (MyPinballs). This text string is based off of a serial data project that he did for integrating Bally displays into P-ROC games back in the day. I really liked the text format, so I kept within the same style for this, but added extra functions. Thank you Jim!
That should be all you need to get running. If you find any errors in any of this, please let me know here and I will correct it.
Thanks Everyone!


